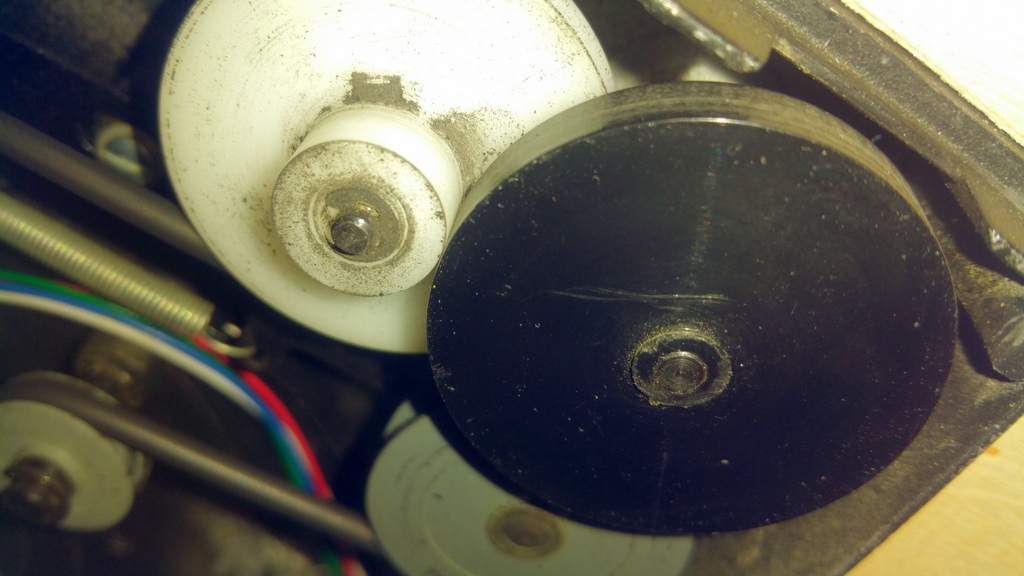
The thing to remember about the take up reel is that it's main job is to keep the film from spilling onto the floor. It does not really play a part in advancing the film through the projector other than to clear the film path. The main parts of the take up are
Green Arrow: Slip Clutch Roller
Blue Arrow: Slip Clutch Pulley
Red Arrow: Receive Disc
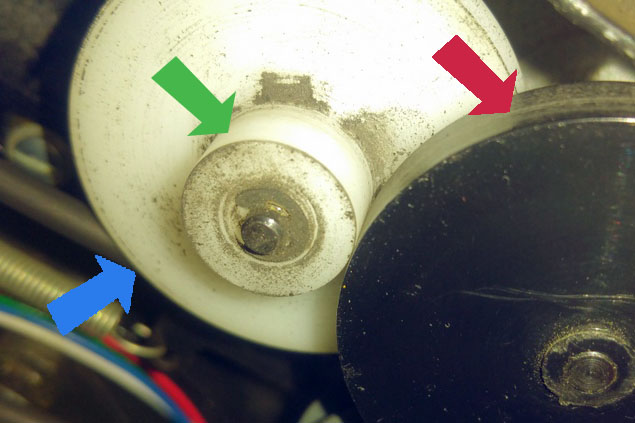
The Slip Clutch is mounted on a spring loaded rocker arm that presses the white slip clutch roller against the black receiver disc, which is on the back side of the take up reel spindle. If too much pressure is applied, then the take up reel will pull prematurely and affect registration at the gate. If the pressure is too little, then slack will be created and the film will eventually spill onto the floor.
The original GAF slip clutch had a rubber grommet that wore out rather quickly, even when new 35+ years ago. So used projectors had grommets that were dry rotted and cracked. We replaced them with a machined slip clutch made out of Delron, which is a tough industrial plastic. Over time, the rubbing action against the receiver disc can do two things: 1) Cause a depression or groove in the white roller the width of the receive disc and 2) Cause a wax build up on the outer edge of the receiver disc. The depression means that the back edge of the receiver disc can sometimes catch on the edge of the depression which can cause too much transfer of power because it can no longer "slip" (resulting in an aggressive take up reel) or the receiver disc can ride up on the edge of the depression and cause a lack of contact which reduces the transfer of power (thus creating a weak take up reel).
For proper tension, you need to do a couple of things.
A) Use some fine grain sand paper and wrap it around the roller part of the white slip clutch roller and turn it repeatedly until the surface of the roller part is smooth with no discernible depression. It should be the same diameter from the outer edge of the roller to where it meets the slip clutch pulley.
B) Use an exact-o knife with a new blade and lay it flat on the outer edge of the black receiver disc. There is actually a notch in the chassis above the receiver disc to accommodate this procedure. Turn the disc and slowly skim off any waxy build up. Be sure not to dig into the plastic. Keep the blade flat. Then follow up with sand paper to smooth out the edge of the slip clutch.
C) Use alcohol to clean all the surfaces including the groove of the white slip clutch pulley.
D) Replace the belt that drives the white slip clutch assembly making sure to clean the groove of any debris that has collected over time and make sure that the belt is in the bottom of the groove and has not slipped out.
If you follow these procedures, you should restore proper tension to the slip clutch assembly. If it appears to pull too much, you can put some stretch in the spring that applies the pressure to the slip clutch. If it appears to pull too little still, then you can shorten the spring a bit and reattach.
Hope this helps!
Roger